Use Google Analytics to Show Popular Content on Your Static Blog
Janne Kemppainen |It is quite easy to recommend your most popular posts to your readers if you are running a WordPress site. What if you are using a static site generator such as Hugo instead? On this post you’ll learn how to add a popular posts section by using data from Google Analytics, and how to automate the whole process.
These are the main technologies that we’ll be using in this post:
- Google Analytics API
- Python
- Hugo
- GitHub Actions
I’m going to assume that you have already configured Google Analytics on your website.
I will be using the Google Analytics Reporting API v4 for which you can find the Python quickstart from here. I’ll include the required steps here but you can also check the link for additional information.
Enable Google Analytics API
As the first step you need to use the setup tool to create a project in the Google API Console where you can then enable the API and create new credentials for accessing it. You can get to the setup tool by using this link. (The same link can be found from the quickstart article linked above.)
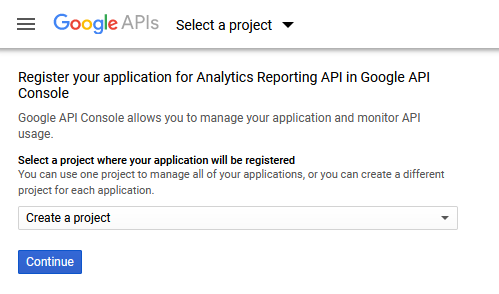
Select an existing project or leave the selection to “Create a project” to create a new one. Click continue.
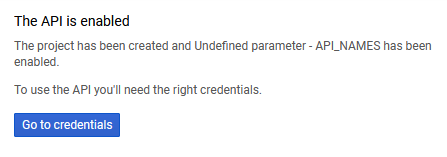
Click go to credentials.
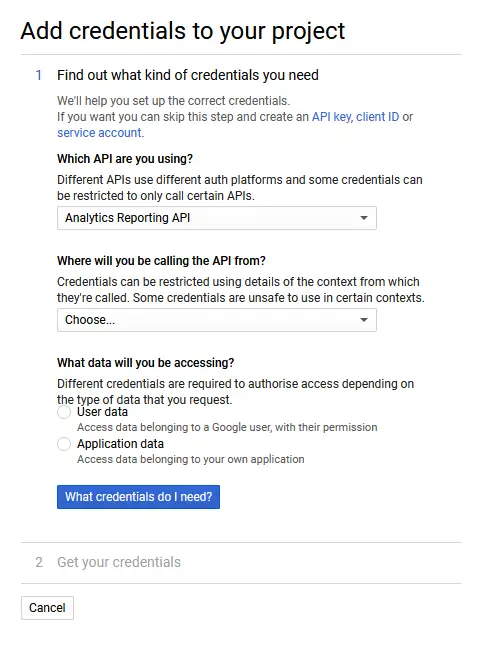
You can skip this and go straight to the service account creation by clicking the link that says “service account”.
You should be directed to the service account page of your Google Cloud project. Click ➕ CREATE SERVICE ACCOUNT at the top.

Fill in a name for the account, for example ga-client. You can also add a short description so that you remember what that account is used for.
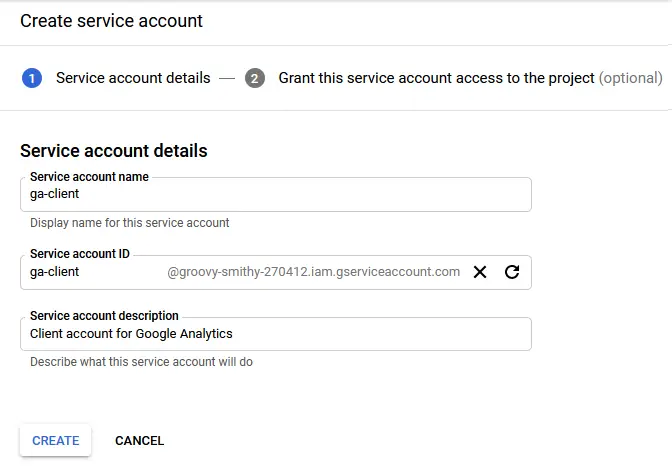
Click “Create”. The next step asks for service account permissions. This is an optional step and not required for our account so just click continue.
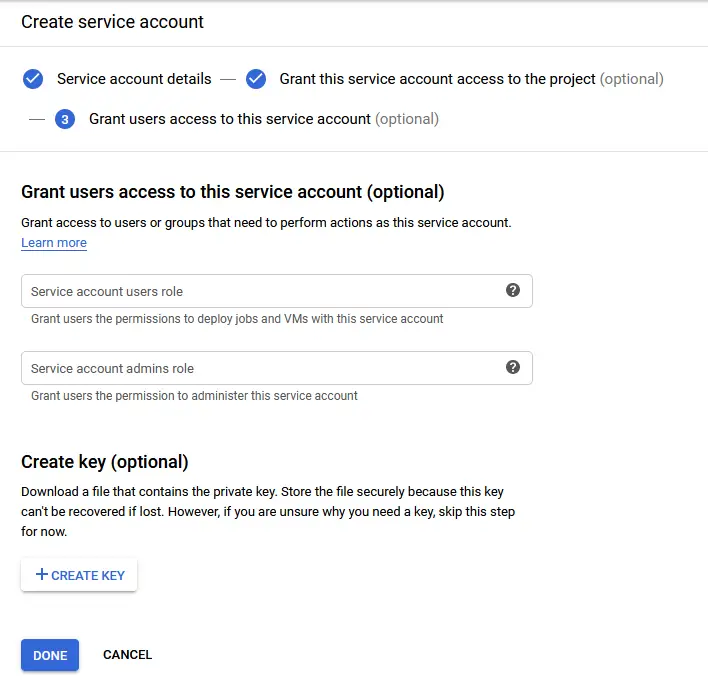
In the third step click the “create key” button to create credentials for the service account. Select the JSON format and save the file to your computer. Remember to treat this file securely and do not share it to others. Finally, click done.
The service account is now created and it should be visible in the list of service accounts for your project. The first column of the table shows the email address of the account which should look like [email protected]. Copy the email address to the clipboard.
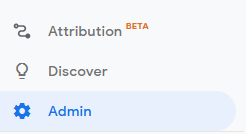
Next, log in to your Google Analytics dashboard. Go to the admin view from the navigation menu.
There are different levels of configuration. The rightmost column configures the views. Select the view that contains the data for your site.
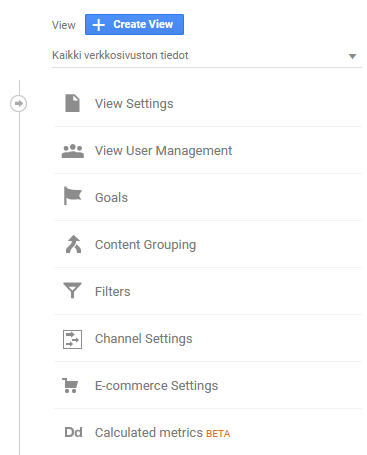
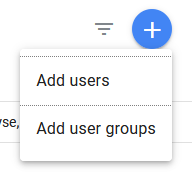
Click the second option “View User Management” and then the big plus sign to add users.
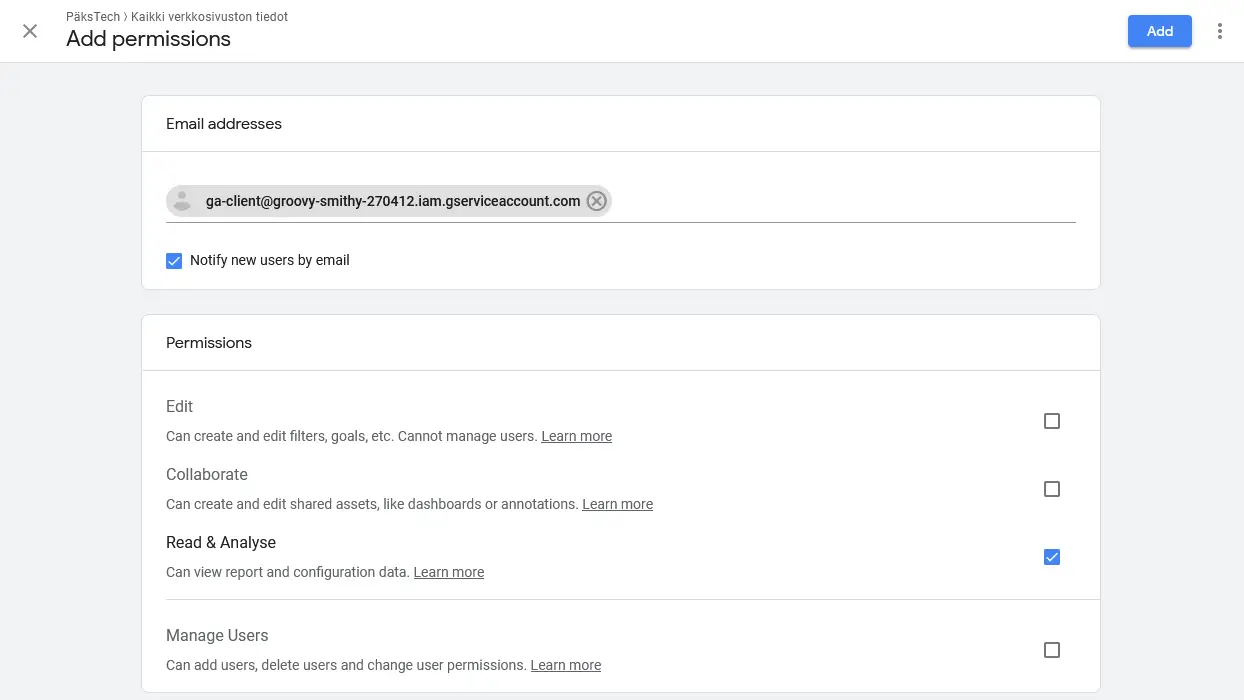
Fill in the service account email and give it the Read & Analyze permissions.
The account is now ready for programmatic access to Google Analytics.
API client script
The next thing to do is to create a small Python script for fetching data from the API and storing it to a file that we can use when building the site. The script will create a list of the most popular posts.
For the development you need to have Python installed. If you’re on Windows you can check my tutorial here.
During this tutorial you should work in the Git directory of your static website.
By the way, if you’re using Linux/MacOS you might want to check out how you can improve your Python development process with GNU Make
After installing Python you need to create a file called requirements.txt at the root of your website project which should look like this:
google-api-python-client
google-auth
These are the only dependencies that we need to communicate with the Google Analytics API.
Next, you’ll need to create a virtual environment.
>> python3 -m venv venvThen activate it, on Windows
>> .\venv\Scripts\Activate.ps1or on Mac/Linux
>> . venv/bin/activateInstall the requirements
>> python3 -m pip install -r requirements.txtYou don’t want to include the virtual environment in your Git repo so add this line to your .gitignore file:
venv/Find your Google Analytics view ID with this tool. You can use the Dimensions and Metrics Explorer to get an understanding of the parameters that are available through the API. You can also find the API doc for the batchGet call that we are going to use in the script from here.
Create a file called popular.py but change the VIEW_ID to match your own GA view.
import googleapiclient.discovery
import json
import re

from google.oauth2 import service_account

VIEW_ID = "191255146"
MAX_PAGES = 10
SCOPES = ["https://www.googleapis.com/auth/analytics.readonly"]
SERVICE_ACCOUNT_FILE = "service_account.json"
BLOG_REGEX = re.compile(r"^\/blog\/[\w\-]*\/$")

credentials = service_account.Credentials.from_service_account_file(
    SERVICE_ACCOUNT_FILE, scopes=SCOPES
)

analytics = googleapiclient.discovery.build(
    serviceName="analyticsreporting", version="v4", credentials=credentials,
)


def get_report():
    body = {
        "reportRequests": [
            {
                "viewId": VIEW_ID,
                "dateRanges": [{"startDate": "7daysAgo", "endDate": "today"}],
                "metrics": [{"expression": "ga:users"}],
                "dimensions": [{"name": "ga:pagePath"}],
                "orderBys": [{"fieldName": "ga:users", "sortOrder": "DESCENDING"}],
            }
        ]
    }
    return analytics.reports().batchGet(body=body).execute()


def get_popular_pages(response):
    popular_pages = []
    reports = response.get("reports", [])
    if reports:
        report = reports[0]
        for row in report.get("data", {}).get("rows", []):
            popular_pages.append(row["dimensions"][0])
    filtered = [page for page in popular_pages if BLOG_REGEX.match(page)]
    if len(filtered) > MAX_PAGES:
        filtered = filtered[:MAX_PAGES]
    return filtered


def main():
    response = get_report()
    pages = get_popular_pages(response)
    with open("data/popular.json", "w") as f:
        f.write(json.dumps(pages, indent=4))


if __name__ == "__main__":
    main()
Let’s go through the code so that you understand what’s going on.
Constants
After the imports the VIEW_ID value should match your own Google Analytics view ID. You can also change the MAX_PAGES value to choose how much diversity you want to have in the suggestions. I’ve selected the top ten most popular pages to be included.
The SCOPES value defines which API features we want to access. SERVICE_ACCOUNT file should match the JSON credentials that you downloaded for the service account. I’ve changed the name of the file to service_account.json. Note that you should not check this file into Git!
To prevent you from accidentally committing the credentials to Git you should add this to your .gitignore file:
service_account.jsonPath matching
The last constant in the script is a regular expression for detecting paths that look something like /blog/hugo-popular-content/. This way we wont accidentally include the home page or other popular pages as recommended.
This is not the default way that Hugo renders paths if your content has multiple levels of directories, my config.toml has this configuration to change the URL structure:
[permalinks]
    blog = "/blog/:filename/"
Using this configuration lets me organize the content any way I want while still keeping the URLs short and nice. I put my posts in yearly directories but I don’t want to include year numbers on the URLs. If you follow some other URL scheme then you need to adjust the regular expression accordingly.
The regular expression that I’m using reads as follows:
- the string should start with
/blog/ - then there should be any number of characters and dashes (
-) - the string should end with a
/
I can really recommend https://regex101.com when you need to write regular expressions. It’s just such a super useful tool.
Fetching report data
The next lines set up the API connection by reading the service account credentials from the service_account.json file and by building the API client for the Analytics Reporting API v4.
The get_report() function uses the API connection to fetch the report data. The body variable defines what data we want to receive:
viewIDis the ID of the view that you want to fetch data fromdataRangesdefines the start and end dates which in this case contain data from the last seven daysmetricsselects that we are interested in the user count datadimensionssets the user count to be shown per page pathorderBysorders the page paths in descending order by their user counts
Parsing data
The get_popular_pages() function just goes through the response to find the paths that match the regular expression and limits the amount of results to ten.
After the data has been manipulated it is then stored to a file named data/popular.json.
Before running the script you need to create a directory called data. This is the place where our script is going to write the results, and it’s also where Hugo searches for data files.
Run the script with
>> python3 popular.pyand if all went well you should see that a new file was created in the data directory. Check that the file contains a list of paths in JSON format.
Hugo template
Now that we have the data we need a way to display it. In an earlier post we already created a view for related content, and we can now reuse the widget that we created there.
This is a bit complicated but bear with me, I’ll explain how it works..
<div class="content">
    <h2>Popular posts</h2>
</div>
{{ .Scratch.Set "popular" slice }}
{{ range $.Site.Data.popular }}
    {{ if ne . $.RelPermalink }}
        {{ $.Scratch.Add "popular" . }}
    {{ end }}
{{ end }}
{{ $popular := shuffle (.Scratch.Get "popular") | first 3 }}
<div class="columns">
{{ range where $.Site.RegularPages "RelPermalink" "in" $popular }}
    <div class="column is-one-third">
    {{ partial "widgets/post-card-small.html" . }}
    </div>
{{ end }}
</div>
I’ve placed this piece code just below the related content part in the blog/single.html template file that we edited in the post linked above.
The logic here is that we open the generated data of popular pages and randomly select three posts to be shown at the end of a blog post. My initial attempt was a bit more naive than this but it had one flaw, a popular page might recommend itself.
I couldn’t find a simpler way to filter an array so I had to resort to using Scratch. Scratch is a place where you can store intermediate values for a page. In this example we’re using it to store the popular pages that are not the current page.
A new scratch key popular is first initialized with an empty slice (array). Then the page data for popular paths is looped with range and each value is added to the scratch if it doesn’t match the permalink of the current page. Note that we need to use dollar signs inside the range loop to access the page variables because the dot context refers to the value in the data file.
After the current page has been filtered out the rest are shuffled and the first three elements are stored to a new array.
Finally, the regular pages of the whole website are looped through but the where clause filters the results to only those pages whose .RelPermalink can be found from the list of the three popular paths. Then the cards for these pages are rendered on the page.
This is what the end result looks like.

GitHub Actions
The final thing left to do is to automate everything. We are going to set up a process where GitHub is going to trigger an action once a week to fetch the popularity data for the previous seven days and commit that back to the repository. Because we are using Netlify (configured in this tutorial) to host the site it will be automatically built and updated after each commit.
Secrets
We can’t openly store the service account file in our repository because then anyone could access our data. We have to store an encrypted version of the file in the repository and configure our action to decrypt the file before running the Python script.
You will need to use a tool called gpg to encrypt the service_account.json file. You can download GnuPG from here, or you can install it with the package manager of your OS.
Use the following command to encrypt the file
>> gpg --symmetric --cipher-algo AES256 service_account.jsonInput a passphrase when prompted. Commit the file that ends with .gpg to the repository.
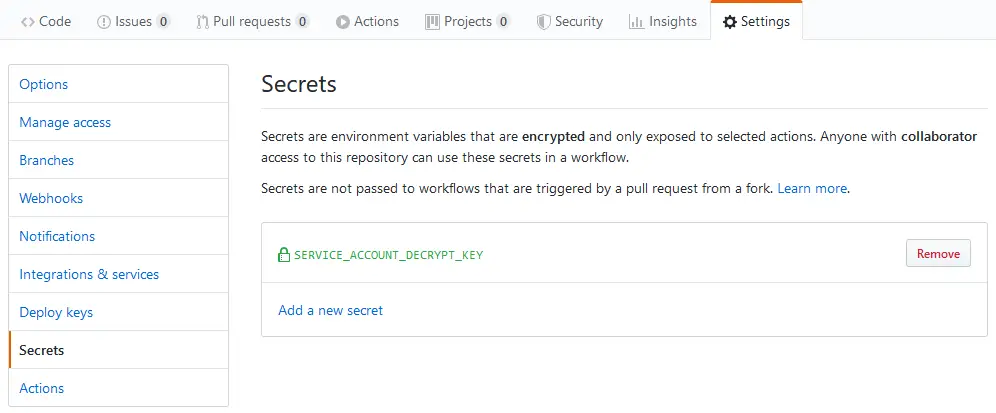
Next, open your repository on GitHub, go to the Settings tab and select Secrets. Enter the passphrase that you just gave and save the secret as SERVICE_ACCOUNT_DECRYPT_KEY.
Flow
Now is the time to write the Action flow. Go to the Actions tab on your GitHub repository and skip the suggestions by clicking the “Set up a workflow yourself” button.

A code editor view should open with some sample workflow code. Replace it with the following:
name: Update Popular Pages

# Run every Sunday 23:59 UTC
on:
  schedule:
    - cron: "59 23 * * 0"

jobs:
  build:
    runs-on: ubuntu-latest

    steps:
    - uses: actions/checkout@v2
    - name: Setup Python
      uses: actions/setup-python@v2
    - name: Install dependencies
      run: |
        python -m pip install --upgrade pip
        pip install -r requirements.txt
    - name: Decrypt service account secret
      run: |
                gpg --quiet --batch --yes --decrypt --passphrase="$SERVICE_ACCOUNT_DECRYPT_KEY" --output service_account.json service_account.json.gpg
      env:
        SERVICE_ACCOUNT_DECRYPT_KEY: ${{ secrets.SERVICE_ACCOUNT_DECRYPT_KEY }}
    - name: Run analytics script and commit data
      run: |
        python popular.py
        git config --local user.email "[email protected]"
        git config --local user.name "PäksTech Bot"
        git add data/popular.json
        git commit -m "Update popular post data"
    - name: Push changes to repo
      uses: ad-m/github-push-action@master
      with:
        github_token: ${{ secrets.GITHUB_TOKEN }}
The first settings gives a name to your flow. Use something descriptive.
The on part selects when the script should be triggered. Because we want to update the data periodically we need to use the schedule trigger. This accepts a schedule in the same way that you’d define one for a cron job. In my example it triggers every Sunday at 23:59 UTC.
Next there are the build steps. The build runs on an Ubuntu server and has multiple steps.
The first step checks out the current repository. After the checkout step the work directory contains the repository data.
The next steps set up the latest version of Python and install the requirements. Then the service account file is decrypted back to service_account.json. The decrypt key is fetched from the secret storage that was set up earlier.
The final steps run the custom script, configure git user data and commit the popular.json file to Git. Change the user email and name values to what you want.
Finally, the last part uses the GitHub Action for GitHub Push to push to the master branch. This custom action which is available on the Actions Marketplace makes it really straightforward to push local changes back to the project.
Conclusion
If you’ve managed to follow through this post, congratulations! Now your blog has a fully automated recommendation system for popular content. At least I found it really rewarding when I finally got this to work.
I hope that you learned something new along the way. I sure did!
Read next in the Blog with Hugo series.
Get to the Correct Blogging Mindset
Discuss on Twitter
I figured out how to show popular posts on a static blog and now you can do it too!
— Janne Kemppainen (@pakstech) March 13, 2020
Tech used:
- @googleanalytics API
- #Python
- @GoHugoIO
- @github Actions
- @Netlify https://t.co/uhbTwgLTlq
Next post
Building URLs in Python