Gentle Introduction to GitHub Actions
Janne Kemppainen |Want to start using GitHub Actions but don’t quite know how to get started? In this post I will explain Actions in an easily digestible way so that you can start adding useful logic to your repositories. This post will be full of examples so let’s get going!
Note that this post is not about building your own actions but it shows how to get started with existing actions from the Actions Marketplace. I plan to add tutorials for custom Actions in the future.
Also the amount of possible configurations and settings is huge. After reading this article and getting a general idea about Actions I recommend that you go to the GitHub Actions Documentation to deepen your knowledge.
You can create your own test repository to try these in action. I have also created a public repository called actions-playground where you can find all examples mentioned in this blog post. You can use it as a reference, and it is also open for pull requests.
What are GitHub Actions?
You might already know this but GitHub Actions is a way to run your own logic on a GitHub repository. You can use it to add comments to pull requests, automatically tag issues, create releases, run unit tests, build distributables, send notifications, trigger deployments, the list goes on and on.
Basically you get a small virtual server that is spun up when an event happens on your repository. This can be for example a new commit, pull request, issue or a comment. Actions can also be triggered on schedule.
The Actions runner starts executing a series of steps that are specified in a configuration file in your repository. These configuration files can combine many Actions scripts together to perform complex operations.
GitHub Actions comes with runners for Linux, Windows and macOS which makes it possible to target any platform. The Linux runtime is recommended for private repositories as it consumes the least of your Actions minutes quota. The Windows and macOS runners consume minutes at 2 and 10 times rate compared to Linux.
You get 2,000 Actions minutes/month free quota for your private repositories (pricing), and they are free to use for public repositories. You can also store up to 500MB worth of private packages in GitHub Packages, public packages can be stored for free.
Actions syntax
Actions are defined with YAML files in a directory called .github/workflows/ where GitHub expects to find any Actions configurations. You can find the full reference to the workflow syntax from the GitHub Help.
A workflow file consists of three parts:
- name is the name of your workflow that is also displayed on the repository’s actions page
- on contains the rules when your action should trigger
- jobs contains one ore more jobs that should run when the action is triggered
Two optional sections, env and defaults, let you configure environment variables and default values for all jobs in the file.
On the Actions tab of your GitHub repository there will be a card that suggests a simple workflow as a starting point. If you click Setup this workflow you will see an editor with this sample configuration:
# This is a basic workflow to help you get started with Actions

name: CI

# Controls when the action will run. Triggers the workflow on push or pull request
# events but only for the master branch
on:
  push:
    branches: [ master ]
  pull_request:
    branches: [ master ]

# A workflow run is made up of one or more jobs that can run sequentially or in parallel
jobs:
  # This workflow contains a single job called "build"
  build:
    # The type of runner that the job will run on
    runs-on: ubuntu-latest

    # Steps represent a sequence of tasks that will be executed as part of the job
    steps:
    # Checks-out your repository under $GITHUB_WORKSPACE, so your job can access it
    - uses: actions/checkout@v2

    # Runs a single command using the runners shell
    - name: Run a one-line script
      run: echo Hello, world!

    # Runs a set of commands using the runners shell
    - name: Run a multi-line script
      run: |
        echo Add other actions to build,
        echo test, and deploy your project.
This workflow contains the three main parts that I mentioned, name, on and jobs. The name can be any string that you want to identify the workflow with and there isn’t much more to that. However, the on and jobs keywords have more complex options.
Triggering with on
In the on section you define when the workflow has to run. The default configuration contains two types of events: push and pull_request. These have been further narrowed down to only pushes or pull requests to the master branch.
You can configure many branches by adding new items in the list, separated by a comma. You can also use the alternative YAML list syntax like this:
on:
  push:
    branches:
      - master
      - develop
This triggers the workflow whenever a commit is pushed to either the master or develop branch.
You can also use a Glob pattern wildcard to match certain patterns. One use case is to match specific tag names:
on:
  push:
    tags:
      - v1*
This would match pushes to tags such as v1.0, v1.2.3 and so on.
Wildcards can also match file paths. This can be useful to perform actions based on edited directories or file types. This configuration runs only on pushes that change Python files:
on:
  push:
    paths:
      - '**.py'
The double asterisk matches any path, including those containing slashes / .
Actions can also react to other webhook events in your repository. Here are some more examples, check the documentation to see all available activity types.
Someone commented on an issue or a pull request:
on:
  issue_comment:
    types:
      - created
An issue is opened or closed:
on:
  issue:
    types:
      - opened
      - closed
A pull request is reviewed:
on:
  pull_request_review:
    types: [submitted, edited]
A new release is released:
on:
  release:
    types:
      - released
You can also run on schedule:
on:
  schedule:
    - cron: '0 0 * * 1'
The schedule syntax should follow cron formatting. The above example would trigger at 00:00 every Monday.
Logic with jobs
The main logic of the workflow lives in the jobs section. You can configure many jobs at once and they are run in parallel by default. Let’s take another look at the default sample code:
# A workflow run is made up of one or more jobs that can run sequentially or in parallel
jobs:
  # This workflow contains a single job called "build"
  build:
    # The type of runner that the job will run on
    runs-on: ubuntu-latest

    # Steps represent a sequence of tasks that will be executed as part of the job
    steps:
    # Checks-out your repository under $GITHUB_WORKSPACE, so your job can access it
    - uses: actions/checkout@v2

    # Runs a single command using the runners shell
    - name: Run a one-line script
      run: echo Hello, world!

    # Runs a set of commands using the runners shell
    - name: Run a multi-line script
      run: |
        echo Add other actions to build,
        echo test, and deploy your project.
This defines a single job called build. You can choose any name but it must contain only alphanumeric characters and - or _. Jobs must also be unique within the workflow file.
The first item inside the job defines the runner type. You should use runs-on: ubuntu-latest unless you have a specific reason to use another runner. It consumes fewer resources when using actions for private repositories. Use windows-latest or macos-latest to run on Windows or macOS.
Steps contains all the steps in the job. There are quite many options for configuring a step but the sample workflow is quite basic.
The uses keyword defines which action should be executed by the step. The checkout action is part of the official GitHub actions and it’s probably the most common action you’ll use. It checks out your repository to the actions runner for the later steps.
The checkout action didn’t include the name parameter but the other two steps do. The name is used in the Actions UI to describe the step.
The run keyword lets you run stuff on the command line. These examples only echo messages to the terminal but you could replace the commands with anything else. Just make sure that the command you want to run is available on the runner and install the required packages in an earlier step if needed.
You can use the pipe character | to define multiline commands.
Examples
Now you should have a basic understanding of Actions. Here are some practical examples that you could start using right now! The Awesome Actions repository is also a great place to find useful actions.
I have configured these examples in the actions-playground repository where you can see them in action. And as a reminder, new contributions are always welcome!
Automatic pull request labeling
The first example is for labeling pull requests based on the changed content. The actions/labeler is one of the “official” actions made by GitHub and meant just for this purpose. The action monitors pull requests and assigns labels based on file extensions and directories.
The labels can be helpful to see what types of PRs you have open in your repo to filter documentation only changes or put more effort to actual code changes. I guess you can imagine the possible benefits.
This one is really simple to configure. Create a configuration file .github/labeler.yml and define some labels with rules:
🐍 python:
  - "**/*.py"
  - "*.py"

📝 documentation:
  - "**/*.md"
  - "*.md"

🐳 docker:
  - "Dockerfile"

⚙ ci:
  - ".github/**"
The configuration file uses the YAML syntax just like the actual workflow file. Each top level item represents a label and the list items under them define the rules when to use them. The asterisk character works as a wildcard to match files that live in a certain directory or have a specific file name or extension.
Notice how you can use emoji within the label names!
Directory level rules can be useful if some areas need specific domain knowledge for reviews or if they are critically important. Core functionality could have its own label, or you could have separation between backend and frontend. In a monorepo it can be useful to have automatic labels for each component.
The actual workflow file is simple, save this as .github/workflows/pr-labels.yml and it will work in any repository:
name: PR Labeler
on:
- pull_request

jobs:
  label:
    runs-on: ubuntu-latest
    steps:
    - uses: actions/labeler@v2
      with:
        repo-token: "${{ secrets.GITHUB_TOKEN }}"
The name of the workflow is “PR Labeler” and it will show up in the “Actions” tab of your repo and in the list of pull request checks. It runs on the default pull request events such as created or push. The workflow consists of a single job that contains only the labeler action.
When you open a pull request with the action configuration the github-actions bot should add the ⚙ ci label automatically.

Check the actions/labeler repository for more detailed instructions or continue configuring your repository with the labels that you need.
Greet first time contributors
The actions/first-interaction is another action from GitHub. It allows you to configure automatic greetings to first time contributors or issue openers. These messages could contain information about the contribution process or link to the documentation for common issues.
This action is also super simple to set up. Create a workflow file like the one below and save it as .github/workflows/first-interaction.yml:
name: First interaction

on:
  issues:
    types: [ opened ]

jobs:
  interaction:
    runs-on: ubuntu-latest
    steps:
    - uses: actions/first-interaction@v1
      with:
        repo-token: ${{ secrets.GITHUB_TOKEN }}
        issue-message: |
          Thank you for posting an issue!

          As a reminder, have you checked the [wiki](https://github.com/jannekem/actions-playground/wiki) for common issues?
        pr-message: |
                    Thank you for your first contribution to the project! I will take a look at you pull request as soon as possible. In the meantime, you should check that your PR follows the contributor guidelines. This will make it easier to review the code and get it merged faster. Thanks!
Now when someone creates a new issue or PR in your repo they are greeted with the message of your choice.
As you can see the action triggers when an issue is opened. GitHub counts pull requests as issues too so they are covered by the same rule.
Close stale issues
In a large project the number of open issues can creep up over time. The actions/stale action helps to keep them in line by labeling stale issues after a certain time inactivity. And if they don’t get further attention they will be closed.
This example is straight from the repository README file, you can save it as .github/workflows/stale.yml:
name: "Close stale issues"
on:
schedule:
- cron: "0 0 * * *"
jobs:
stale:
runs-on: ubuntu-latest
steps:
- uses: actions/stale@v3
with:
repo-token: ${{ secrets.GITHUB_TOKEN }}
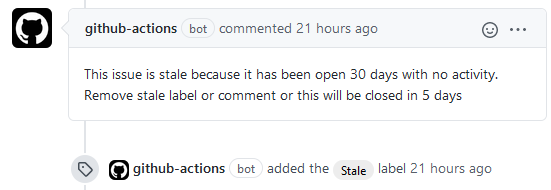
stale-issue-message: 'This issue is stale because it has been open 30 days with no activity. Remove stale label or comment or this will be closed in 5 days'
days-before-stale: 30
days-before-close: 5
Here the trigger condition is a cron schedule. It can be read as “run at 0 minutes, 0 hours, every day of the month, every month, every day of the week”, or run every day at midnight.
The stale action is the only step in the workflow. Only the repo-token parameter is required but you’ll need additional configurations to make this work.
The most important ones are stale-issue-message and stale-pr-message. If they are not provided then the issues or pull requests won’t be marked stale.
You can also set how long it should take before issues are marked as stale and what labels to use. All available configurations can be found from the action definition.
This is how the stale warning looks in practice.
Check code style
I’m all for automating code formatting! Tools like black or flake8 ensure consistency for your Python code while ESLint does the same for JavaScript. Here I configure checks for Python.
Other languages probably have suitable actions in the marketplace too, or the checks could be run with a few run commands.
Black
Black is actually a code formatter that changes your code to match the opinionated standard so you don’t have to think about the formatting. It would be nice to run Black against all pull requests to your project and automatically commit the formatting changes if required. Unfortunately this is not possible as the actions runner doesn’t have edit permissions when running from forks. This is to prevent actions from performing malicious actions on other repositories.
Then the next best thing is to fail a check for a pull request that doesn’t meet the formatting. This will make sure that whoever is contributing to the project has to have their code properly formatted before it can be merged. The Black GitHub repository contains its own Action and it’s as simple as adding the following workflow:
name: Black

on: [pull_request]

jobs:
  black:
    runs-on: ubuntu-latest
    steps:
      - uses: actions/checkout@v2
      - uses: actions/setup-python@v2
      - uses: psf/black@stable
Save the file for example as .actions/workflows/black.yml. If you’re having issues with the stable version not initializing you can try @master which should work. The example configuration in the README is set up to run on both push and pull_request events but this causes the check to run twice on PR’s so I’ve only included the PR event here. Hopefully you’re not pushing directly to master.
Black doesn’t require any configuration to run but if you do want to change some settings that can be done with the help of the pyproject.toml file. So, if you’re like me and prefer 100 character lines over 88 characters then create the following pyproject.toml file at the root of the repository:
[tool.black]
line-length = 100
Check the Black documentation if you’re wondering how Black uses the configuration file. This blog post is also a great read about why pyproject.toml exists and how it is used for packaging. It’s really worth a read if you work with Python!
If you’re not already using Black your code will probably fail the inspection. You can also fail the check quite easily on purpose. Black unifies strings to double quotes unless using single quotes would reduce the amount of character escapes. Therefore the following file would not pass:
print('Hello World!')
If you commit this to the same PR with the Black setup you should see the red cross that indicates a failure. Change the file to double quotes or run Black on your computer and commit the changes and the PR should become green.
Flake8
Flake8 is a linter that wraps Pyflakes, pycodestyle and the McCabe complexity check into one tool that can be expanded with third-party extensions.
A linter tries to find common programming errors and bad practices by statically analyzing your code. It helps you follow the coding conventions, catches syntax errors and protects you against various other rule violations.
Flake8 can be configured in various ways from command line options to configuration files. The supported configuration locations are .flake8, setup.cfg and tox.ini. If you’re already using the setuptools config file then that is probably where you should put this configuration. The last option works if you’re using tox. If you don’t know what you’re doing just use .flake8 (note the leading dot).
Here is a Black compatible configuration with a maximum line length of 100 characters. Change this to match your own preferences (88 if you use default Black settings).
[flake8]
max-line-length = 100
select = C,E,F,W,B,B950
ignore = E203, E501, W503
The workflow is easy to configure with just a few steps, save the following configuration as .github/workflows/flake8.yml:
name: Flake8
on:
  pull_request:

jobs:
  flake8:
    runs-on: ubuntu-latest
    steps:
    - uses: actions/checkout@v2
    - uses: actions/setup-python@v2
      with:
        python-version: '3.x'
    - name: Run Flake8
      run: |
        python -m pip install flake8
        flake8
The steps start with checking out the repository, then using actions/setup-python to configure the Python version, and finally installing and running Flake8.
If the flake8 command returns an error the whole workflow will fail. This should protect you from merging potentially problematic code.
You can try that the check works by violating one of the configured rules. Adding an unused import is an easy way to trigger an error so you could change your sample file to this:
import os
print('Hello World!')
The Flake8 check on your PR should now fail.

Of course static code analysis won’t spot all errors but it’s a good addition to your safety net!
Run unit tests
Speaking of safety nets, unit tests are probably the most common way to ensure code quality. We are used to running tests on our own computers and on CI servers and services such as Jenkins and CircleCI. Now we can do the same with Actions.
It’s easy to see the benefits of running tests on the GitHub repository:
- avoid “works on my machine” conversations, CI is king
- reviewers don’t need to run the code on their machines to see the test results
- test multiple runtime versions at once
- prevent broken code from being accidentally merged
- see which commits have passed the tests
- give some confidence to dependency updates (for example from Dependabot)
This post is not about writing unit tests for any specific language so I’m going to use a super simple test file that I put in tests/test_dummy.py:
import unittest


class TestDummy(unittest.TestCase):
    def test_is_false(self):
        self.assertFalse(True)  # fails
Also create an empty tests/__init__.py file so that we can use unittest test discovery.
You can run the tests on command line with the python -m unittest command which should discover the test automatically.
Now let’s translate this to a custom action workflow, .actions/workflows/unittest.yml:
name: Run unittests
on:
  push:

jobs:
  unittest:
    runs-on: ubuntu-latest
    strategy:
      matrix:
        python-version:
          [3.6, 3.7, 3.8]
    steps:
      - uses: actions/checkout@v2
      - uses: actions/setup-python@v2
        with:
          python-version: ${{ matrix.python-version }}
      - name: Run tests
        run: python -m unittest
Here I introduced a feature that we haven’t used before, buid matrix. With the matrix option you can configure many simultaneous run environments at once with different parameters. In this case we are testing with three Python versions.
The keywords that you define under the matrix section are available as parameters like you see on the setup-python step.
We can use the run command to execute the tests. Note that in a real application you probably need to perform some initialization first. Typically you’d install any required packages. If you’re using a requirements.txt file to manage dependencies the final step could look like this:
      - name: Run tests
        run: |
          python -m pip install -r requirements.txt
          python -m unittest
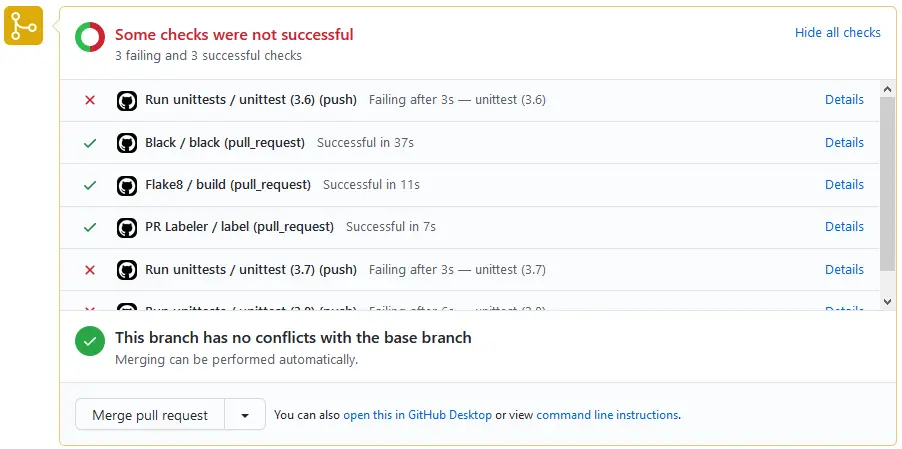
All three unit test executions fail as expected. You can click the details link to view the test logs and see what went wrong.
When the test case is fixed all checks should pass again.
Branch protection
Now that you have code quality checks and unit tests in place you can set up branch protection rules to prevent a PR from being merged if the checks don’t pass.
Go to the Settings tab in your repository and choose Branches from the left menu. Here you can create a new branch protection rule with the “Add rule” button.
Give the name of the branch that you want to protect such as master or main in the name pattern section. Check the “Require status checks to pass before merging” option and choose all relevant status checks to be required. Within the scope of this post they would be black, flake8, unittest (3.6), unittest (3.7) and unittest (3.8).
You can also check the “Require branches to be up to date before merging” to make sure that the branch has all the latest code and still passes the tests. You can also require that a PR has certain amount reviews before it can be merged.
The branch protection rules help you avoid those “oopsie” situations where code gets merged too early.
Conclusion
Hopefully this post has given you the information you need to start using Actions with your own repositories. Remember to check the actions-playground repo if you haven’t already and send your own contributions or just come and say hi!
I will probably create other blog posts about GitHub Actions when I figure out what else could be added to the repository.
Until next time!
Discuss on Twitter
This is your gentle introduction to GitHub Actions https://t.co/gSB91vbKtO
— Janne Kemppainen (@pakstech) August 11, 2020
Previous post
Install openmediavault on ProxmoxNext post
Backup Files with Duplicacy