Time Manipulation in Node-RED with Moment
Janne Kemppainen |Moment.js is a popular JavaScript library for parsing, validating, manipulating and displaying dates. The node-red-contrib-moment package is an adaptation of the library to Node-RED. In this post I’ll share some examples that should jumpstart your journey with Moment.js.
If you’re interested in reading more about how to get started with Node-RED you can read this article where I’ve also gathered examples of using different libraries.
Installation
Just like any other Node-RED package you can install node-red-contrib-moment on the web UI from the top right corner by selecting Manage palette -> Install. Search with the package name, select install and after a while you should be good to go.
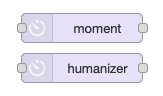
The moment and humanizer nodes should now be available on the left side panel under the formats group.
Time display and manipulation
A standard way to store time values is to use timestamps. One such format is the Unix time which is defined as the number of seconds that have elapsed since 00:00:00 UTC on January 1st, 1970. Sometimes this can also be referred to as epoch time. Right now, and for a very long time to come these timestamps consist of ten numbers.
A modification of this format is to include milliseconds in the timestamp. This adds three more numbers at the end of the timestamp. If you add an inject node to your Node-RED flow, select timestamp as the payload type and route the output to a debug node you’ll notice that timestamps in Node-RED have millisecond precision.
Here’s an example value 1585247524132. If you click the number in the debug entry you’ll notice that it will be shown as a human readable timestamp, such as 2020-03-26T18:32:04.132Z. Clicking again will show the value in your local timezone 3/26/2020, 8:32:04 PM [UTC+2].
Still, this is just a number under the hood. The debug window is smart enough to display the value in different formats.
You can use the moment node from node-red-contrib-moment to transform this numeric value to a datetime string format. The library also accepts JavaScript datetime objects or valid string representations as input.
Drag and drop an input node, a moment node and a debug node to the flow area and connect them together like in the image below. Click the “Deploy” button to save and apply the changes.

If you now click the input trigger button the value printed to the debug console will be a string such as "2020-03-26T18:32:41.269Z". This output format matches the standard ISO 8601 in UTC time. Note that we didn’t need to add any configuration to make this work!
The whole configuration view of the node looks like this.
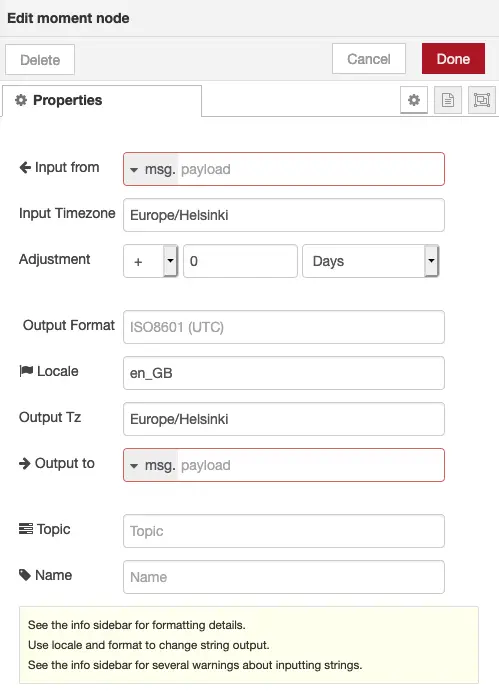
You can change the input and output sources as normal. The default value is the message payload which works with most nodes out of the box.
If the defined input doesn’t exist or it is blank the node will output the current timestamp. This can be useful when you want to attach time information to a message.
Edit the node settings to take input from and output to msg.timestamp. Change the debug node to print the whole msg object. Now if you trigger the inject node you’ll see that the payload value goes through the moment node but the message also contains a new property timestamp.
You can also change the output format to your liking. Check the official documentation of Moment.js for the allowed tokens in the output format string. For example using DD-MM-YYYY would print something like 26-03-2020. Month names are also supported: MMMM Do, YYYY would print out March 26th, 2020. Try out the different options yourself!
The default locale is en_GB for British English. You can change the value to some other locale to change the names of the months and days of the week. For example de_DE changes the language to German, and a format string with dddd, Do MMMM YYYY prints out Donnerstag, 26. März 2020. The locale selection also affects how string inputs are parsed so set it to en_US if you want to use the date ordering used in the US.
You can also change the timezone if you want to use something else than the one on your system. You can find all the accepted values from moment-timezone.
Finally, the topic field sets the msg.topic property to whatever you define here. If you connect the node to an MQTT out node this value will be used if the topic configuration in the MQTT node is left blank.
The name field just changes the display name of the node on the flow.
Humanizing times
The second node in the library is called “humanizer”. It takes an input as an integer seconds and outputs a human friendly string.
Let’s build a simple example to see how this node works. Build a flow like the one in the image below.

Node configurations:
- inject: repeat interval every 1 seconds
- counter: default step 30, mode increment, outputs split (2)
- humanizer: use defaults
- debug: use defaults
This simulates the passage of time in an accelerated way with a counter that is incremented by 30 every second.
The humanizer node now sees an integer value and outputs the humanized version as msg.payload.humanized. These values start as “a few seconds” and “a minute” and then continue as “2 minutes”, “3 minutes”, up to 44 minutes after which the result will be “an hour”.
If you change the default step to 3600 seconds (1 hour) you can see that hours are incremented in the same way until 21 after which it will show “a day”. And the days, in turn, are incremented up to 25 days after which it becomes “a month”, and so on.
As you can see, the idea of the humanized version is to give an approximate timespan instead of an exact date. For events that happened more recently you generally like to know a more accurate timeframe but as time goes on you might not really care whether it happened 47 or 48 days ago.
Conclusion
And that’s it for now! I hope you found this little tutorial useful and are now able to adapt the Moment library to your own projects.
Previous post
Building URLs in PythonNext post
Get to the Correct Blogging Mindset