Getting Started with Hugo
Janne Kemppainen |In the last post of the series we touched the surface and learned what Hugo is. This time we will dive deeper and actually create our first example site with a ready theme.
Installation and new site creation
So, first things first. You need to have Hugo installed. Head over to gohugo.io and follow the instructions to install Hugo on your system. On a Mac it is super easy if you have Homebrew installed, just type brew install hugo in your terminal and you should be good to go. If you are on Windows 10 there is an alternative to the official installation as you can enable the Subsystem for Linux, install Ubuntu and then use sudo apt install hugo. This way you can have the hugo command, git, and so on on a Unix shell while still running Windows. This is the way I have Hugo set up on my Windows machine. Read how to develop with Windows Subsystem for Linux to set up your Windows environment.
The version in the apt repository will probably be behind the most recent version. So in order to install the latest version you need to go to the Hugo releases page and select the correct version for your system.
For example on WSL you should copy the address of the .deb file and download the file with wget:
>> wget https://github.com/gohugoio/hugo/releases/download/v0.57.1/hugo_extended_0.57.1_Linux-64bit.debI recommend that you install the extended version which has native support for SASS/SCSS as we will be needing it with the Bulma CSS framework later on in the series.
Install the package using the dpkg command:
>> sudo dpkg -i hugo_extended_0.57.1_Linux-64bit.debSo assuming your installation went without hurdles let’s start. I’m also going to assume that you’re using some sort of Unix shell so you’ll need to adapt if you’re using Windows (and not Subsystem for Linux). We’ll start by creating a new Hugo site. You can use any name but I’ll use pakstech as an example.
>> mkdir websites
>> cd websites
>> hugo new site pakstech
>> cd pakstech
This is the humble beginning of our site. I created the websites directory just to keep my home directory cleaner if I create more than one site. There really isn’t anything yet as we can see:
>> tree .
.
├── archetypes
│   └── default.md
├── config.toml
├── content
├── data
├── layouts
├── static
└── themes

6 directories, 2 files
Hugo doesn’t even ship with a default theme!
Add a theme
Because I want to give you the feeling of satisfaction of seeing something that is working let’s head on to browse some Hugo Themes. There are many themes available and if you happen to find one that suits your needs and you don’t need to do any customization then you’re almost ready to go. Just follow the instructions for that theme and maybe join me later on when we’ll get to deploy our site. If you want to create something yourself or want a deeper understanding of Hugo then read on.
To test that your Hugo installation actually works navigate to the themes directory and install the Blank theme:
>> cd themes
>> git clone https://github.com/vimux/blank
>> cd ..
If you don’t have Git installed you can download it from here. Right now you don’t need to know much about Git but later in it will be useful to know. I have a blog post called Git Essentials for Beginners which should get you started with Git.
Next, edit config.toml with your favorite text editor and set the theme to blank
>> vim config.toml
theme = "blank"
Open a new terminal window and navigate to the root of the project directory and run the Hugo server.
>> hugo server -D --disableFastRender

                   | EN
+------------------+----+
  Pages            |  6
  Paginator pages  |  0
  Non-page files   |  0
  Static files     |  1
  Processed images |  0
  Aliases          |  3
  Sitemaps         |  1
  Cleaned          |  0

Total in 3 ms
Watching for changes in /Users/janne/websites/pakstech/{content,data,layouts,static,themes}
Watching for config changes in /Users/janne/websites/pakstech/config.toml
Serving pages from memory
Running in Fast Render Mode. For full rebuilds on change: hugo server --disableFastRender
Web Server is available at http://localhost:1313/ (bind address 127.0.0.1)
Press Ctrl+C to stop
Now you have a local server running on port 1313 so go and check how it looks on your browser at localhost:1313! The -D flag tells the Hugo server to include posts that are still in draft and --disableFastRender rebuilds the whole site every time a file changes (don’t worry it’s still blazing fast). Keep this server window running in the background and do the rest of the development in another terminal instance.
Now you should have a page just like the one in the image below.

Crate a new post
Next, to get an idea how Hugo works let’s create a new blog post:
>> hugo new post/my-first-post.mdThis command creates a new markdown file inside the content/post directory. Note how the file already has some content in it. This data between the triple dashes is called front matter. Hugo filled the page title based on the file name you gave and automatically added the date parameter to be the time when you created the file. The Hugo theme uses these parameters to place them to the correct positions on the HTML page but parameters can also be used for custom logic.
The automatically generated front matter is formatted in the YAML format. You can also use toml or json formats if you like but in these tutorials we’ll be using yaml.
---
title: "My First Post"
date: 2018-11-13T17:28:09+02:00
draft: true
---
Maybe you already noticed that your browser window automatically refreshed and the page content changed right after you added the new blog post. Even though the front matter says that the post is still a draft Hugo rendered it for us because we used the -D flag. You can navigate to your post to see how it looks. As you probably guessed it isn’t very impressive yet.
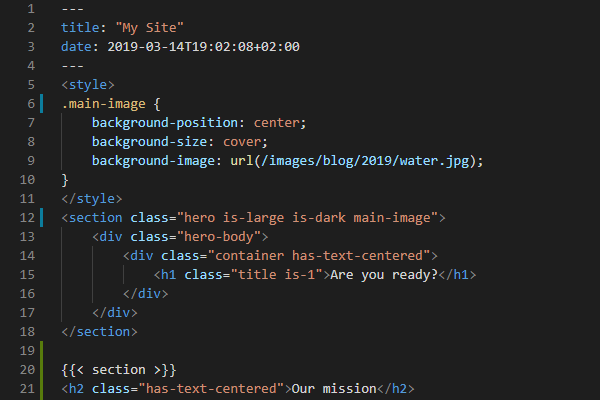
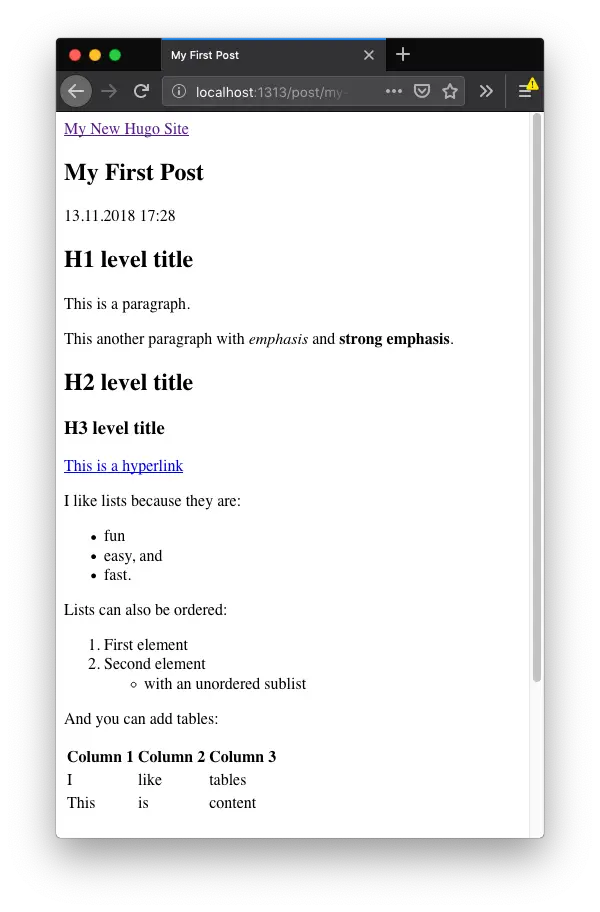
Let’s add some content so that you have an idea of how the pages are created. Add the following Markdown to your post and see how it changes:
# H1 level title

This is a paragraph.

This another paragraph with *emphasis* and **strong emphasis**.

## H2 level title
### H3 level title

[This is a hyperlink](http://www.google.com/)

I like lists because they are:

- fun
+ easy, and
* fast.

Lists can also be ordered:

1. First element
2. Second element
  - with an unordered sublist

And you can add tables:

| Column 1 | Column 2 | Column 3 |
| -------- | -------- | -------- |
| I        | like     | tables   |
| This     | is       | content  |
Your post should now look like in the image below. If you view the source code of the page on your browser you will see that Hugo added the necessary HTML tags such as <p>, <ul>, <li>, <table>, and so on to the page by interpreting the formatting in your Markdown.
Adding advanced content
If there is something that you can’t achieve with Markdown you can also write pure HTML inside your content. Hugo also has a special templating language which lets you add complex content without having to write tons of HTML every time you want to add something like a YouTube video or an Instagram post to your page.
Hugo templates and shortcodes are added by surrounding them with double curly braces like this: {{< template >}}. For example adding a YouTube video is as easy as typing {{< youtube youtubeId >}} where youtubeId is the id in the YouTube URL. You can add a Twitter card with {{< tweet user="username" id="123" >}} where the parameter is the tweet id. A full list of built-in shortcodes can be found from the Hugo shortcodes page.
This is how an embedded tweet looks like:
It's great to see that #Microsoft is really committed to open source. Maybe them buying #GitHub wasn't that evil :) https://t.co/UjEAs7N9Gu
— Janne Kemppainen (@pakstech) September 11, 2018
Now, try to add a YouTube video to your post to see how easy it is!
Conclusion
Now you know how to create a new Hugo site, add a theme, create content and use basic shortcodes. You also know how you can test your site locally.
In the next post we will start building our own theme from scratch.
Read next in the Blog with Hugo series.
Previous post
Why You Should Blog with Hugo?Next post
Git Essentials for Beginners