Manage GCP Resources with GitHub Actions
Janne Kemppainen |You can manage Google Cloud resources pretty easily with the gcloud command-line tool, but automating that stuff can be even more fun! In this post we’ll see how to use GitHub Actions to perform actions on GCP.
Before we start I want to address one thing. While in theory it is possible to do quite complicated things with this method remember that there are actual services and free sofware to manage your cloud infrastructure. For example Terraform is a tool that lets you define your infrastructure as code.
The way this is going to work is that we first setup the gcloud tool on the Actions workflow, and then use the command in the next steps like we would on our own machine. You’re only limited by your imagination and the capabilities of the Cloud SDK. If you come up with cool solutions I’d really like to hear about them on Twitter!
If you’d like to learn more about GitHub Actions you might also enjoy my gentle introduction to GitHub Actions.
Setup gcloud
There is an action for setting up the gcloud command on an Actions runner, conveniently named google-github-actions/setup-gcloud.
First, you will need to set up a service account with the correct permissions. Service accounts are identities for services and machines that are used to grant permissions to different resources in the cloud.
Go to the Service accounts page on the Cloud Console, select the desired project, and create a new service account with the name of your choice. Click the email address of the service account you just created, navigate to the Keys tab and create a new key. When you create the key it will be downloaded to your computer.
Next, go to Settings > Secrets on your GitHub repository and create a new repository secret with the name GCP_SA_KEY. Copy the contents of the downloaded key file as the secret value. Create another secret called GCP_PROJECT_ID and set this to your target GCP project ID.
Note: The service account needs to have correct permissions so that it can do the things you want it to do. If you’re unsure about the configuration check the Google Cloud documentation, starting from service account permissions.
Now the gcloud command can be configured with this simple step in a workflow file:
- name: Set up Cloud SDK
  uses: google-github-actions/setup-gcloud@master
  with:
    project_id: ${{ secrets.GCP_PROJECT_ID }}
    service_account_key: ${{ secrets.GCP_SA_KEY }}
    export_default_credentials: true
This step will configure the gcloud command to be available for all remaining steps in the workflow.
Create a VM instance on Compute Engine
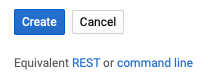
The GCP web console has a great feature where you can configure a new virtual machine with all the desired parameters, and finally get the equivalent gcloud command from the bottom of the page. This saves you from a lot of hassle and makes sure that you actually get what you want and won’t forget a configuration parameter.
So go to VM instances on Cloud Console, click Create instance, configure the kind of VM you’d like to create and scroll down all the way to the bottom of the page. There, below the Create button, you will find a small link that will show you the equivalent command line.
The command will look something like this (I have manually added the line breaks with \ to make this easier to understand):
gcloud beta compute --project=my-project instances create my-instance \
		--zone=us-central1-a \
		--machine-type=e2-medium \
		--subnet=my-project-vpc \
		--network-tier=PREMIUM \
		--maintenance-policy=MIGRATE \
		--service-account=123456789-compute@developer.gserviceaccount.com \
		--scopes=https://www.googleapis.com/auth/devstorage.read_only,https://www.googleapis.com/auth/logging.write,https://www.googleapis.com/auth/monitoring.write,https://www.googleapis.com/auth/servicecontrol,https://www.googleapis.com/auth/service.management.readonly,https://www.googleapis.com/auth/trace.append \
		--image=debian-10-buster-v20210217 \
		--image-project=debian-cloud \
		--boot-disk-size=10GB \
		--boot-disk-type=pd-balanced \
		--boot-disk-device-name=my-instance \
		--no-shielded-secure-boot \
		--shielded-vtpm \
		--shielded-integrity-monitoring \
		--reservation-affinity=any
Because we have already defined the GCP project ID in the Cloud SDK setup step we don’t need to repeat it again in the gcloud command. The version we’re using will work without the beta part so that can be dropped away as well.
This example workflow spins up a VM when you trigger it manually with a workflow dispatch event, you can save it for example as .github/workflows/create-vm.yaml in your GitHub repository:
name: Create VM

on:
  workflow_dispatch:

jobs:
  create-vm:
    runs-on: ubuntu-latest
    steps:
      - uses: actions/checkout@v2

      - name: Set up Cloud SDK
        uses: google-github-actions/setup-gcloud@master
        with:
          project_id: ${{ secrets.GCP_PROJECT_ID }}
          service_account_key: ${{ secrets.GCP_SA_KEY }}
          export_default_credentials: true

      - name: Create VM
        run: |
          gcloud compute instances describe my-instance --zone=us-central1-a || \
          gcloud compute instances create my-instance \
              --zone=us-central1-a \
              --machine-type=e2-medium \
              --subnet=my-project-vpc \
              --network-tier=PREMIUM \
              --maintenance-policy=MIGRATE \
              --service-account=123456789-compute@developer.gserviceaccount.com \
              --scopes=https://www.googleapis.com/auth/devstorage.read_only,https://www.googleapis.com/auth/logging.write,https://www.googleapis.com/auth/monitoring.write,https://www.googleapis.com/auth/servicecontrol,https://www.googleapis.com/auth/service.management.readonly,https://www.googleapis.com/auth/trace.append \
              --image=debian-10-buster-v20210217 \
              --image-project=debian-cloud \
              --boot-disk-size=10GB \
              --boot-disk-type=pd-balanced \
              --boot-disk-device-name=my-instance \
              --no-shielded-secure-boot \
              --shielded-vtpm \
              --shielded-integrity-monitoring \
              --reservation-affinity=any
Don’t copy this example as is because it is not going to work directly, use the actual values needed for your machine configuration!
We can use the run keyword to run commands such as gcloud on the Actions runner. If you don’t know how this works then you should take a look at the introductory article that I linked in the beginning and come back here later.
The Create VM step starts with a command that checks if the instance has already been created. If gcloud can find the instance it will exit successfully and the part after || will not be evaluated. Note that because of the line continuation character \ the instance creation is interpreted as if it was on the same line.
If the VM doesn’t already exist the first check will fail which means that the expression after || will be evaluated, and the VM will be created. Trying to create a duplicate instance would fail the whole workflow, so this configuration protects us from that.
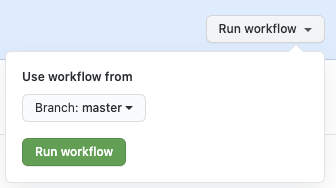
Now if you navigate to the Actions tab on your repository you should see the Create VM workflow added to the list of available workflows. If you click it you will see a notification that says “This workflow has a workflow_dispatch event trigger.” Your repository essentially has a “Start a VM” button.
If you find that you need to run short-living instances, you might be also interested in the self-destroying virtual machines post.
If you work mostly on one zone you might want to configure it in a separate step so that you don’t have to repeat it for every command:
- name: Configure gcloud
  run: gcloud config set compute/zone us-central1-a
Use SSH and SCP
You could even configure commands that run things on the VM via SSH or copy files to the machine. If your workflow creates a set of distribution files to a directory called dist you could copy them over to a VM. In this example I assume that you have configured the zone as shown above.
- name: Copy files
  run: gcloud compute scp --recurse ./dist/ my-instance:~
This copies the dist directory to the home directory of the service account user. From there you could move the files to another location, such as /var/www for a web server.
Maybe your workflow needs to reload Nginx configurations after they have been edited? In that case you could run an SSH command directly on the VM.
- name: Reload nginx
  run: gcloud compute ssh my-instance --command="sudo nginx -t && sudo service nginx reload"
With this combination only your imagination is the limit. You could copy Bash scripts over to the VM with SCP, make them executable with chmod +x ~/path/to/file and run with SSH.
But remember not to go too deep into manual tricks as there are actual tools that can handle these kind of deployments.
Copy build artifacts to Cloud Storage
If your workflow produces files that need to be stored somewhere, one such place could be Cloud Storage. The Cloud SDK also contains the gsutil tool that can be used to access Cloud Storage from the command line. Using gsutil you can do operations on buckets, objects and access control lists, as long as your service account has the proper permissions.
Let’s say that your setup produces a file that needs to be transferred to a bucket. The command could look like this:
- name: Upload release notes
  run: gsutil cp dist/release-notes*.txt gs://my-bucket/release-notes
If you need to copy an entire directory tree you can use the -r option:
- name: Upload distribution
  run: gsutil cp -r dist/* gs://my-bucket
You can read more about gsutil here.
Conclusion
I hope these examples help you jumpstart your journey with GCP and GitHub Actions. If you have more use cases in mind share them on Twitter, and I could even add them on this post. Until next time!
Discuss on Twitter
Manage GCP resources with GitHub Actions. What would you automate with this? https://t.co/al8gwkvvKT
— Janne Kemppainen (@pakstech) March 3, 2021
Previous post
Move a Git TagNext post
In the Flow