Start a Blog With Hugo
Janne Kemppainen |This page contains affiliate links. If you click through and make a purchase, I may receive a commission at no additional cost to you. Thank you for your support! Disclosure
I run my blog with a static site generator called Hugo and as you’re reading this article I’m going to make a wild guess that you’d be interested to start your own blog too. I have created a whole series of blog posts about blogging with Hugo where I go through the required steps to build your own blog from scratch. However, in this tutorial I wanted to condense all the necessary steps to getting your blog up and running as fast as possible with a ready theme.
Looking back, starting out with an existing, clean theme might be the wisest choice. Without lying, I spent over six months building this site before I bought the domain and made it public. That’s six more months that I could’ve had my content out there, gaining visibility. However, I did learn a lot about Hugo and also part of the reason that I wrote the “Blog with Hugo” blog series is that I was teaching it to myself at the same time.
As I mentioned in my post “Get to the Correct Blogging Mindset”:
You should aim to provide value to your readers as early as possible!
So don’t get fixated on how your blog looks initially and just get started with the content. And when you start to feel that you know what you want from your site come back and walk through the Blog with Hugo series to learn how to create your own theme or edit your existing one to fit your needs.
Running your own blog with Hugo is really affordable since you basically only have to pay for the domain name. We will be using a service called Netlify to host the site and they have a generous free tier where you get 100 GB of monthly traffic. That should let you serve quite a lot of monthly visitors for free.
At the beginning the setup and the whole writing with Markdown process might seem intimidating but once your’e all set up it is actually quite a smooth experience. And towards the end of this post I’ll show how you can set up a content management system so that even your mom could write for your site!
With those words, let’s get started!
Tools
Setting up a Hugo blog is not as straight forward as a one click Wordpress installation on a shared host but it’s not rocket science either. There are some tools and ways of authoring that you just need to get used to and after that everything runs pretty much on automation.
Hugo
The first thing you’ll obviously need is the Hugo executable on your own computer. You can find detailed installation instructions for every platform from the official documentation so I won’t be going too much into the details there.
Personally I use a package manager called Chocolatey on Windows to install Hugo with this command on a PowerShell prompt (run as Administrator):
>> choco install hugo-extended
Check that the installation works:
>> hugo version
Hugo Static Site Generator v0.69.2/extended windows/amd64 BuildDate: unknown
Hugo comes in two versions, standard and extended. The extended version includes SASS/SCSS support which is required for some themes to work so you should probably go with that.
Git and GitHub
Next, you will need to create an account on GitHub if you don’t already have one. This is the place where the files of your website are going to be stored before they are built to static HTML files and deployed to the Web. Git is an open source version control system and GitHub is a place where you can store Git repositories.
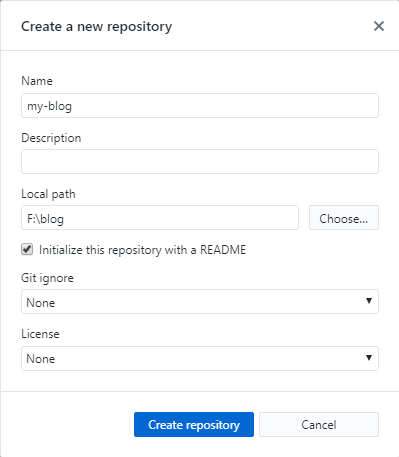
After creating your account go ahead and install GitHub Desktop as it will simplify your Git experience. In the GitHub Desktop app go to File > New repository. Give it a descriptive name and select the checkbox to initialize the repository with a README, then click the “Create repository” button.
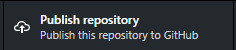
Click the “Publish repository” button to send the new repository to GitHub.
Check the settings in the pop-up window. You can choose to keep your repository private which means that others won’t be able to access the files that are used to build your site. This also means that your blog post drafts won’t be visible to everyone on the Web.
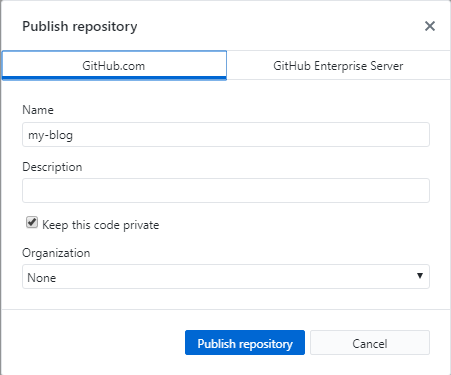
After clicking the “Publish repository” button your GitHub project is all set up for the next steps.
Editor
You’re also going to need a text editor. In theory you could get away with using Notepad but you’d be better off using a proper text editor such as Visual Studio Code.
Create a new site
Next we’ll need to create a new Hugo site. Navigate to the directory above your website repository in a command prompt. For example my example site is located at F:\blog\my-blog so I would need to open the console prompt in F:\blog. Then create the new site with the following command (replace the name of the site with your repository name):
>> hugo new site my-blog --force
Congratulations! Your new Hugo site is created in F:\blog\my-blog.

Just a few more steps and you're ready to go:

1. Download a theme into the same-named folder.
   Choose a theme from https://themes.gohugo.io/ or
   create your own with the "hugo new theme <THEMENAME>" command.
2. Perhaps you want to add some content. You can add single files
   with "hugo new <SECTIONNAME>\<FILENAME>.<FORMAT>".
3. Start the built-in live server via "hugo server".

Visit https://gohugo.io/ for quickstart guide and full documentation.
The output already gives you some tips on what to do next with the site. Navigate to the project directory:
>> cd my-blog
One of the directories inside is called resources. You don’t need to commit it to version control so you can exclude it by creating a file called .gitignore (must start with a dot) with this line in it:
resources/
Find a theme
You can browse for existing themes on the Hugo website. Here are all themes with the “blog” tag. There are quite many to choose from so it can be quite difficult to wrap your head around all the options. Here are some candidates to start your research with:
When you find a theme that you like you should look for any instructions that might be specific to your chosen theme as themes may implement different custom features. I’m going to use the Coder theme because it is quite clean and simple.
If you choose to go with Academic then you should really take a look at their documentation because the setup process is a bit different.
Install the theme
After you have selected the theme that you want to use going forward you need to install it to your repository under the themes directory that was automatically created to your site directory. You could just copy the theme files over but it is recommended to use Git submodules instead. So navigate to the themes directory and add the theme as a submodule:
>> cd themes
>> git submodule add https://github.com/luizdepra/hugo-coder.git
>> cd ..
Now your theme is installed but it isn’t configured yet so Hugo won’t be able to find any layout files.
Site configuration
Your site is configured with the config.toml file. If you open it in your editor it should look like this:
baseURL = "http://example.org/"
languageCode = "en-us"
title = "My New Hugo Site"
What you need to do for this file really depends on your selected theme. There is usually a starter configuration template somewhere in the theme documentation that shows the available features. The built in configuration parameters are also described in the Hugo documentation.
For example the configuration file for my site could look like this (it uses the TOML language):
baseurl = "https://www.pakstech.com"
title = "PäksTech"
theme = "hugo-coder"
languageCode = "en"
defaultContentLanguage = "en"

paginate = 20
canonifyUrls = true

[markup]
	[markup.highlight]
		codeFences = true
		style = "bw"
		guessSyntax = false

[params]
    author = "Janne Kemppainen"
    info = "Hey! I'm blogging about programming!"
    description = "A blog about programming and web development"
    keywords = "blog,developer,personal"
    avatarurl = "images/janne_square.jpeg"

    favicon_32 = "/img/favicon-32x32.png"
    favicon_16 = "/img/favicon-16x16.png"

    footercontent = "Tech, tips and stuff"

    hidecredits = false
    hidecopyright = false

    rtl = false

    math = true
    custom_css = ["css/custom.css"]

# Social links
[[params.social]]
    name = "Github"
    icon = "fab fa-github fa-2x"
    weight = 1
    url = "https://github.com/jannekem/"
[[params.social]]
    name = "YouTube"
    icon = "fab fa-youtube fa-2x"
    weight = 2
    url = "https://www.youtube.com/channel/UCg_e3UBPs-BxPo_jVg1gGOQ"
[[params.social]]
    name = "Twitter"
    icon = "fab fa-twitter fa-2x"
    weight = 3
    url = "https://twitter.com/pakstech/"

# Menu links
[[menu.main]]
    name = "Blog"
    weight = 1
    url  = "/posts/"
[[menu.main]]
    name = "About"
    weight = 2
    url = "/about/"
Let me describe what is going on here so that you don’t need to scratch your head with all those options.
baseurlis the domain of your website, if it isn’t configured properly the links may not be working when you deploy your sitetitleis, obviously, the title of your site. It is also displayed on the left side on the top navigation barthemeshould contain the directory name of your selected themelanguageCodeanddefaultContentLanguageset the content languagepaginatesets how many posts will be listed on one page before they need to be paginatedcanonifyUrlsmakes all relative URLs absolutemarkupsection configures the Markdown engine behavior, in this case how code highlighting should work, see all settings from the documentationparamsconfigures custom parameters that can be used in the theme, what you need to put here depends on the theme that you choseparams.socialis a custom configuration for the Coder theme and it is used to set social icons, many themes implement similar featuresmenu.mainsections define menu items in the site main navigation
There are quite many additional configuration settings available, you can find the full list of options from here.
All available theme parameters for the Coder theme are listed here. Note that this theme assumes that your blog posts are located under the /posts/ path. Your selected theme might prefer some other format such as /blog/. Having the correct organization for the theme is important so that Hugo will be able to find the layout files correctly.
Static content
You can put static content such as images and custom CSS files in the static directory of your website.
My example configuration contains an author image in this path: images/janne_square.jpeg. To make the image appear on the front page I’ll need to copy an image file under the same path in the static directory. The same applies to the custom CSS parameter which should be stored as static/css/custom.css.
It is good form to organize your static content into directories based on their type, for example:
static/images/for image filesstatic/css/for stylesheetsstatic/js/for custom JavaScript
You could further organize images into yearly and monthly directories to make them easier to manage, depending on the amount of files you’re going to have.
Previewing the site
Hugo includes a development server that you can use to preview the site during development and when writing articles. It monitors for changes in your file system and re-builds the site automatically when it detects a change. Because the site generation typically takes under a second development and testing out things is a breeze!
Make sure that you are at the root directory of your website and then use this command to start the server:
>> hugo server -D
The -D flag includes posts that are still in draft mode so that you can work on and preview your new blog posts before publishing them. After the server starts the site will be available at http://localhost:1313.
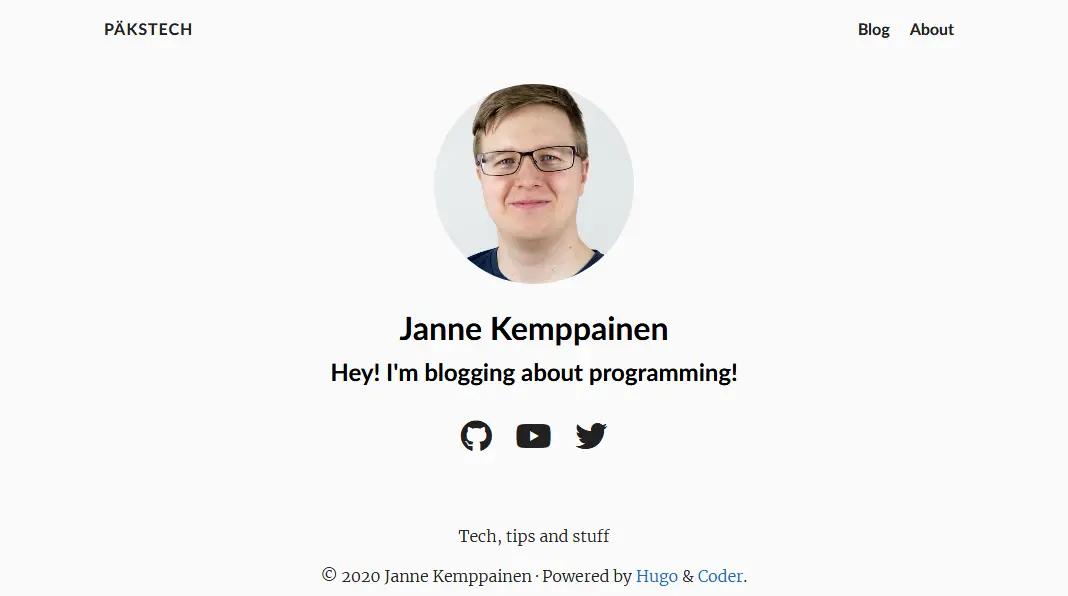
This is how the front page looks like with my configuration.
Content files
The actual content of your website must reside within files written in the Markdown format. The Markdown language is really easy to learn and it is also easy to read and edit because it has been designed for writing prose. Take a look at this Markdown cheatsheet to get to know the features.
You can also mix plain HTML within the Markdown files if you need to add something special. Hugo also has special shortcodes that you can use to easily add snippets such as embedded YouTube videos or tweets.
I’ll discuss the whole authoring process later on in this post as there are multiple options you can choose from. I’ll also show how to set up a workflow where your editors don’t need to know how to use Git at all.
Right now it’s important that you have some dummy content to try things out.
Creating pages
You can use the hugo new command to create new content files. If you have configured your blog path to /posts/ like I have in the configuration file you can create new posts like this:
>> hugo new posts/my-first-post.md
F:\blog\my-blog\content\posts\my-first-post.md created
The file is created in the content directory and when rendered it will be available at http://localhost:1313/posts/my-first-post/. Hugo will tell you the path of the created file on your disk.
Similarly you can create the “About” page with:
>> hugo new about.md
F:\blog\my-blog\content\about.md created
Note that the file name should always end with .md.
Page bundles
There is also another way of organizing content called page bundles. They let you combine multiple files together to form one entity. The typical use case would be to create a bundle for each blog post to keep the images together with the text.
To create another blog post as a page bundle you’ll have to change the command a bit:
>> hugo new posts/my-second-post/index.md
The URL path of the post will now be /posts/my-second-post/. The actual content must be in a file called index.md for the bundle to work properly. You can put any images or other resources in the same directory with your index file and reference them as needed.
Front matter
If you open one of the created files in a text editor it should look something like this:
---
title: "My First Post"
date: 2020-04-25T11:56:25+03:00
draft: true
---
Hugo has automatically added a snippet of YAML at the top of the file. This is called the front matter.
The title parameter configures the title of the page. Hugo has already made a best guess at the title by converting the file name to title format. Change this to the actual title you want to have displayed for your blog post or page.
The date parameter is shown as the publication date of your post and it was automatically generated with the current timestamp when you created the file with Hugo. You should change the value when you actually publish the post.
You can also set the date to a future value. In that case the page will not be rendered until that time has passed so it can be used as a way to schedule blog posts. Note that the post won’t be visible until the site has been rebuilt.
To publish the post you’ll need to change the draft parameter to false or remove the line completely.
Your theme probably supports additional front matter parameters. These can typically be used to configure featured images, categories, tags and other features.
The front matter could look something like this for a blog post with the Coder theme:
---
title: "My First Post"
date: 2020-04-25T11:56:25+03:00
categories:
- Web development
tags:
- development
- hugo
- blogging
featured_image: "/images/blog/2020/04/my-image.jpg"
---
The image path assumes that the configured image is available at the corresponding path in the static directory. If you’re using page bundles and have the image in the same directory with the index file the front matter setting could be like this:
featured_image: "my-image.jpg"
The takeaway here is that each post can be configured with relevant metadata and themes could implement quite fancy features to react to these settings. Read your theme documentation to find out its capabilities.
Writing the content
All text that you want to appear on the page should be put after the front matter block. Because you already have the title configured in the front matter you should probably be using H2 level headings in your text. Here’s a super concise summary of Markdown with Hugo:
This is a blog post about Markdown.
<!--more-->
## H2 heading
This is normal text. *This text is italics* and **this one is bolded**.
Links can be added with this syntax: [link text](https://link.address)
### Lists (H3 heading)
You can also include lists:
- like
- this
The list items can be numbered:
1. first item
2. second item
3. third item
### Images
Images can be added almost like links, just add an exclamation mark!

### Code blocks
```python
def hello(name):
print(f"Hello {name}")
```
The <!--more--> special comment is a way to tell Hugo where the content summary should end and it gives you finer control over the summary. If this comment is omitted Hugo takes by default the first 70 words of your content as the summary. You could also define the summary in the front matter to have different wording. See more information from here.
Otherwise the file can be plain Markdown.
You can also add shortcodes that can be from the built-in ones or provided by your theme. For example:
{{< figure src="image.jpg" title="My image" >}}to add an image as an HTML5 figure{{< tweet 1252186661435379712 >}}to embed from Twitter{{< youtube v9Ui07qCTWg >}}to embed from YouTube
And remember that you can also include any valid HTML within the content!
Site deployment
Now that you have maybe written a few posts and some general pages such as “about”, “contact” or “privacy policy” it is time to get your site published!
Get a domain name
The only thing that you need to pay for in this tutorial is a domain name. If you have already purchased a domain you can continue on to the next part.
I’ve been using Porkbun to get my domains and so far they have been great. They have a fair pricing model where they add $1 on top of the domain wholesale prices. You also get WHOIS privacy for free and can also buy email hosting and other hosting services should you need them.
You can support me by using this link when purchasing your domain and other services at Porkbun at no extra cost to you.
Site configuration
Now that you have a domain for your website you need to configure it to the baseUrl variable in the config.
baseUrl = "https://pakstech.download/"
The Netlify deployment is also going to need some configuration. The configuration used in the Hugo home page is a good starting point, it is available on GitHub.
[build]
publish = "public"
command = "hugo --gc --minify"

[context.production.environment]
HUGO_VERSION = "0.69.2"
HUGO_ENV = "production"
HUGO_ENABLEGITINFO = "true"

[context.split1]
command = "hugo --gc --minify --enableGitInfo"

[context.split1.environment]
HUGO_VERSION = "0.69.2"
HUGO_ENV = "production"

[context.deploy-preview]
command = "hugo --gc --minify --buildFuture -b $DEPLOY_PRIME_URL"

[context.deploy-preview.environment]
HUGO_VERSION = "0.69.2"

[context.branch-deploy]
command = "hugo --gc --minify -b $DEPLOY_PRIME_URL"

[context.branch-deploy.environment]
HUGO_VERSION = "0.69.2"

[context.next.environment]
HUGO_ENABLEGITINFO = "true"
Save this to the root of your GitHub project as netlify.toml. The build section defines where the published site files are located after the build and which command should be used to generate the site. The --gc argument performs some cleanup tasks of unneeded files and the --minify parameter will minify the generated HTML so that the pages load faster.
The version of the Hugo executable is defined with the HUGO_VERSION environment variable. It should match with your local Hugo installation so that you can be sure that the deployment will also work on Netlify. You can check your installed version with this command:
>> hugo version
Hugo Static Site Generator v0.69.2/extended windows/amd64 BuildDate: unknown
The Git info setting enables Git Info Variables which can be used to get the abbreviated commit hash, author name, email, date, hash and the commit message for the file through the .GitInfo object.
The configuration has multiple sections that are used in different contexts. Depending on your usage you might not need all of them for example if you’re not going to do any A/B testing.
Commit changes to GitHub
Now that you have made the required configurations and the site is working locally on your computer it is time to transfer it back to the repository on GitHub.
Open the GitHub Desktop window and type a commit message on the left side of the window and click “Commit to master”.
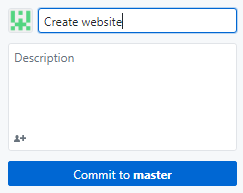
Then click the synchronize button on the top bar to push your changes to the remote repository.

You can go to the repository page on GitHub with your browser to check that the files are there.
Netlify deployment
Next, let’s set up a Netlify account. Go to https://netlify.com and register a new account. You can also use GitHub to authenticate to the site. After logging in you’ll be taken to the management interface.
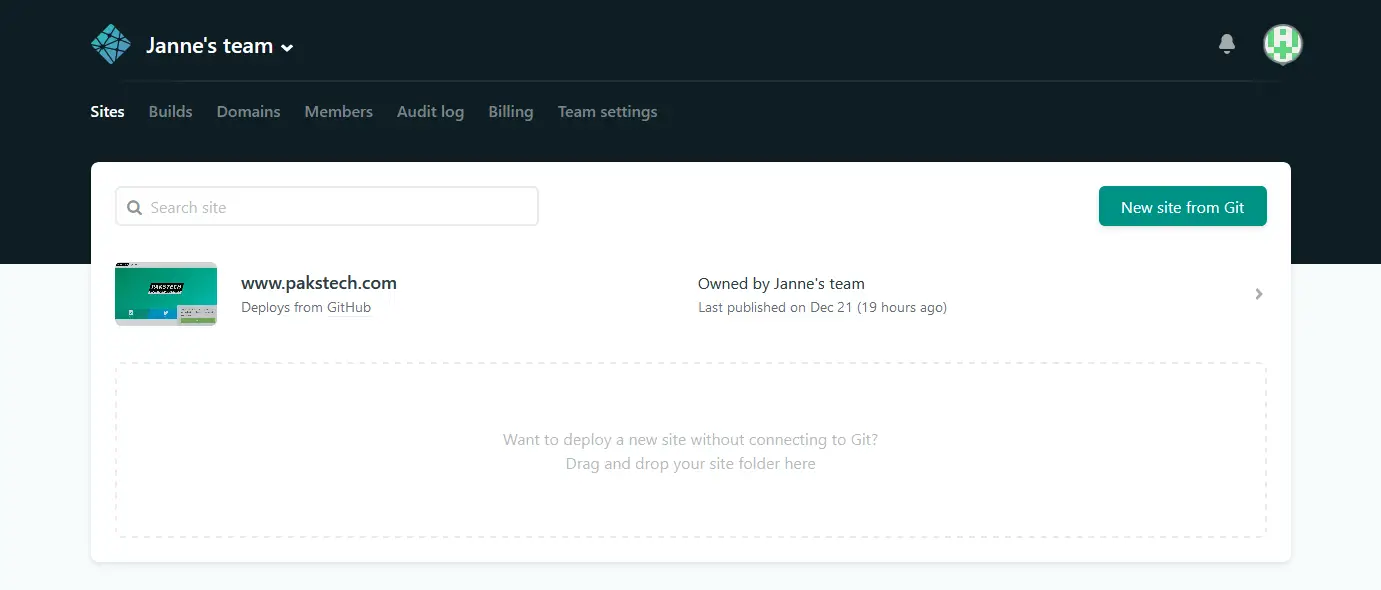
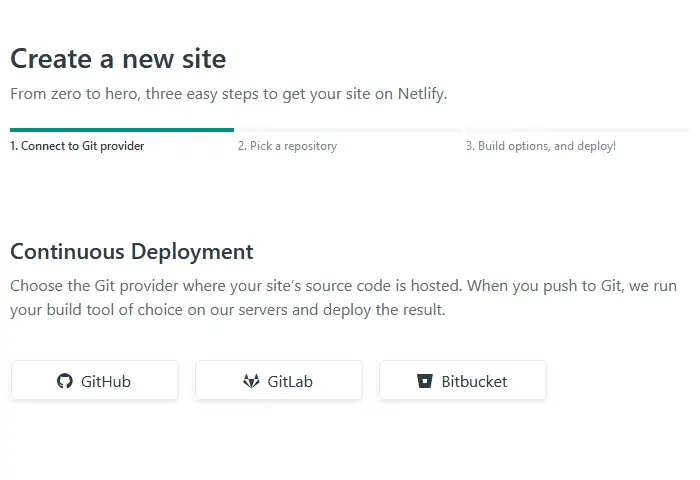
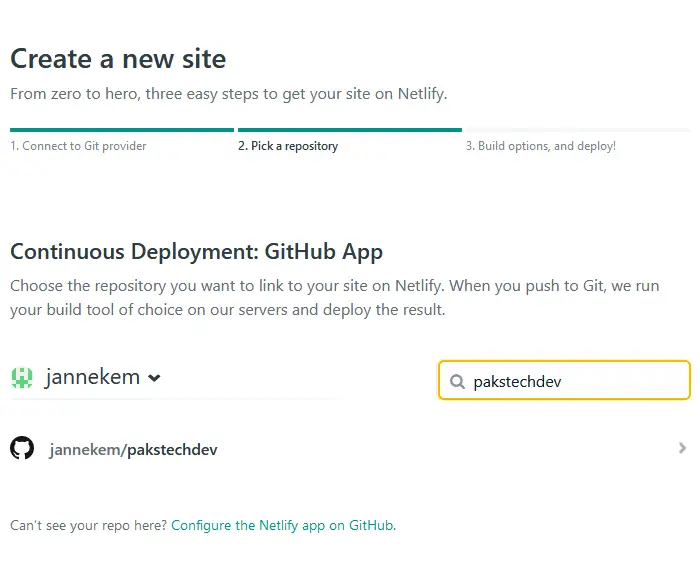
On the “Sites” tab select “New site from Git” and select GitHub as the provider. Approve the authorization request and you should see a list of your repositories. If you want to deploy from an organization repository you need to authorize them separately.
Pick your source repository.
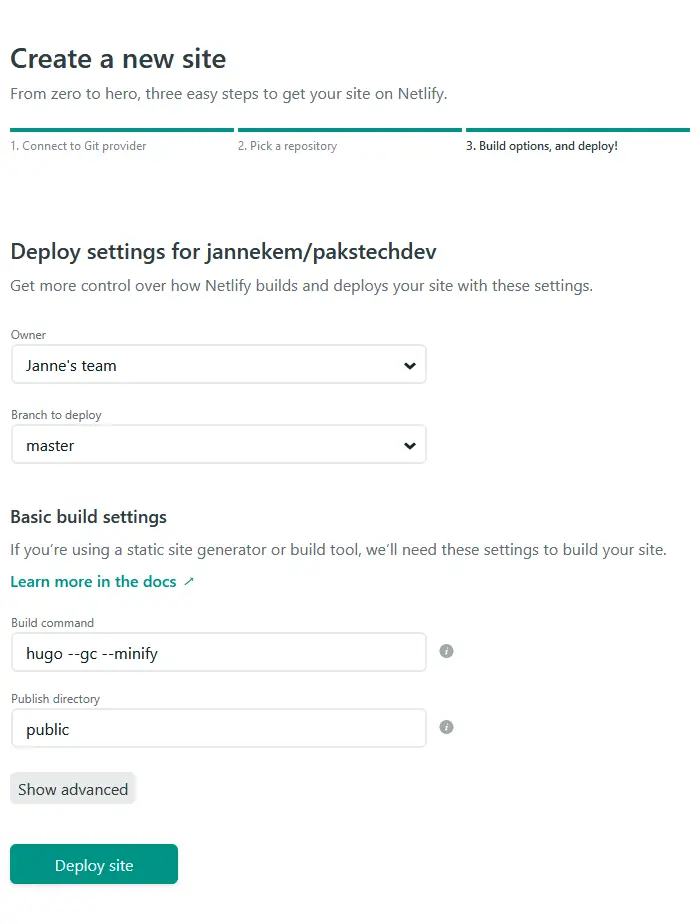
The build options should be automatically populated from the netlify.toml file in the GitHub repository. Accept the build settings by clicking “Deploy site”. The deployment should take a minute or two.
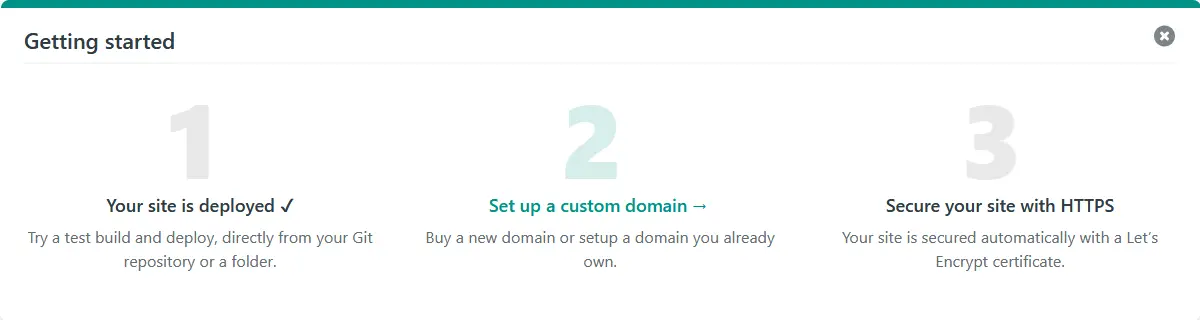
Netlify deploys the site under a randomly generated subdomain so go and check it out.
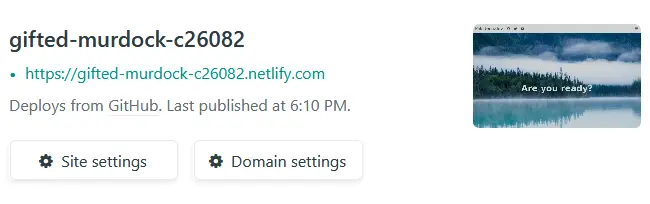
On the “Overview” tab you should now see a suggestion to set up a custom domain. You can also go to “Settings” -> “Domain management” -> “Add custom domain”.
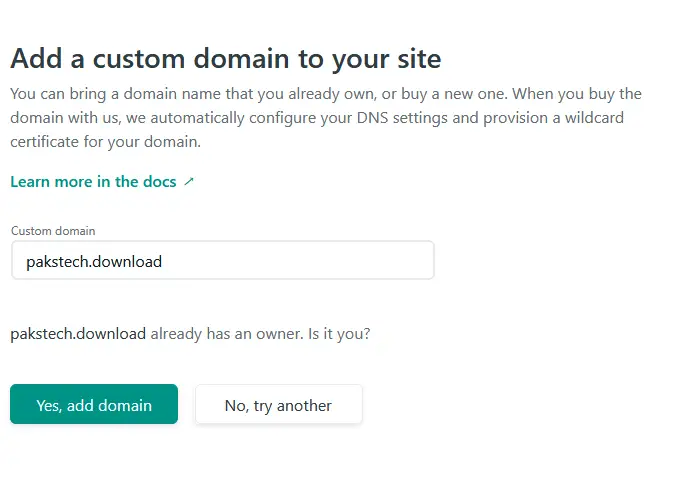
Add your new domain name such as “pakstech.download” to the input box and click “Verify”. You’ll be prompted that the domain already has an owner so proceed to adding the domain.
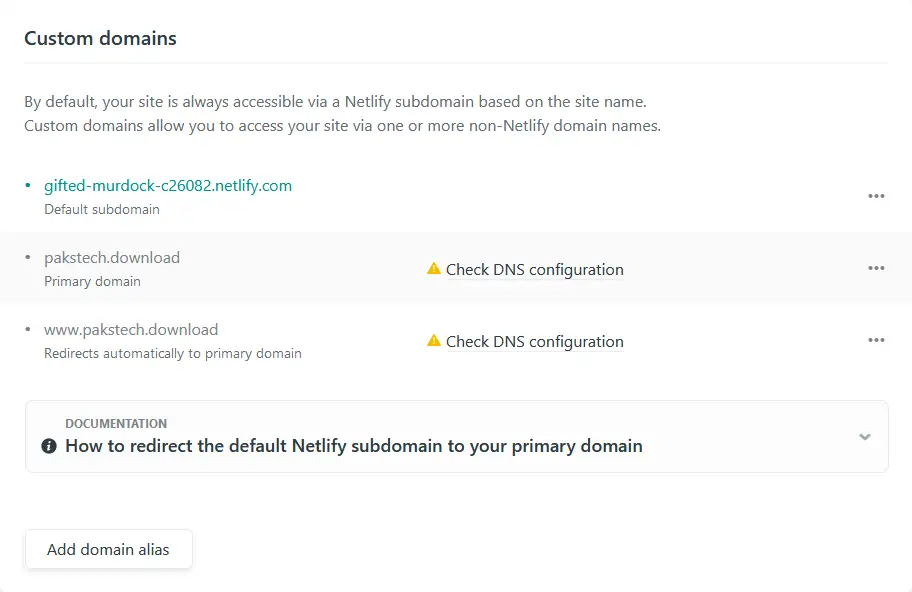
The custom domains section should now show a message “Check DNS configuration” next to your domain name. Click the notification.
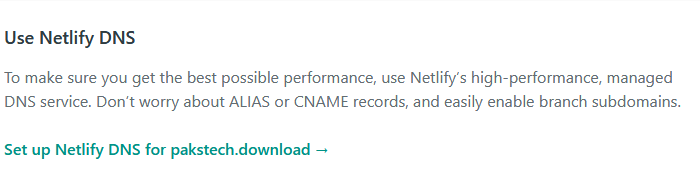
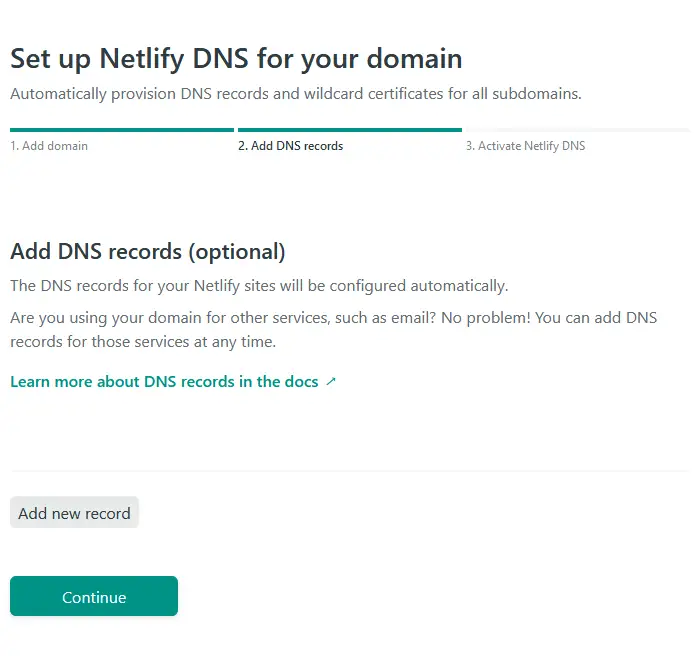
 Then click “Set up Netlify DNS for pakstech.download”.
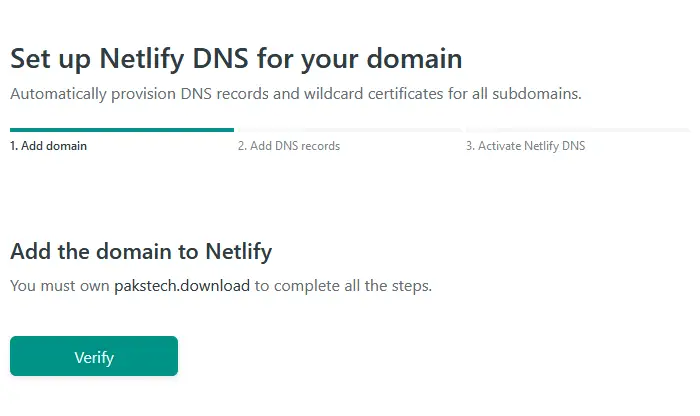
Click “Verify”.
 "
"
You don’t have to add additional DNS records unless you need them for email etc.
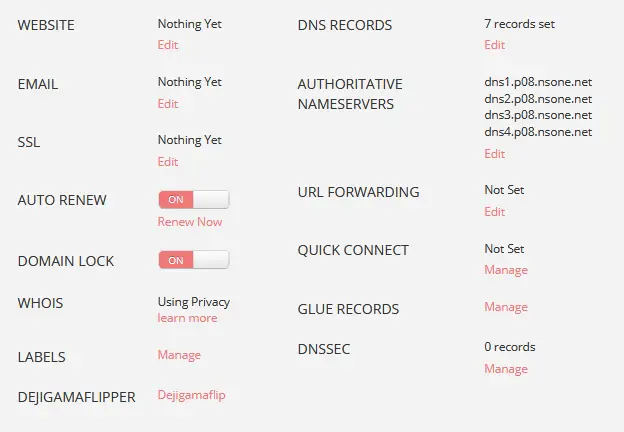
Netlify gives you a list of domain nameservers and you must copy these to your domain registrar.
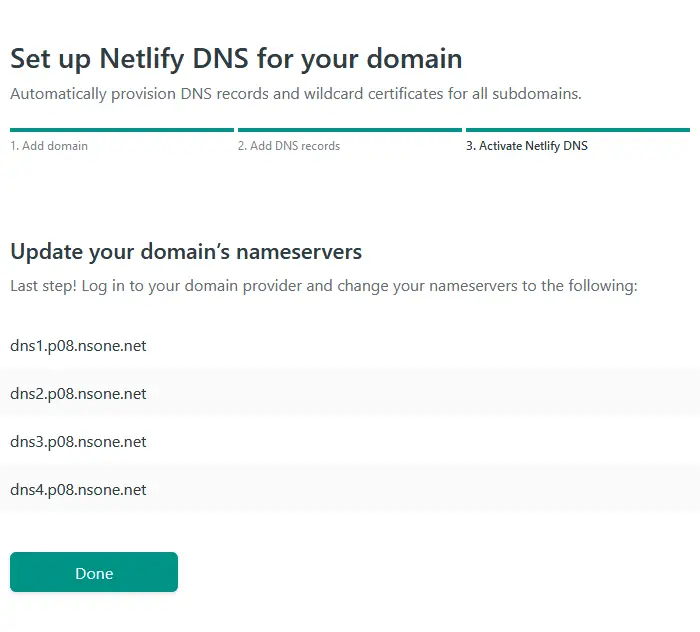
Log in to your Porkbun account, locate the domain that you want to associate with the site and open the details. Click the edit link for authoritative nameservers and copy in the list from Netlify.
It might take some time for the change to propagate through the Internet so be patient. After the site has come online it will take some more time for the SSL certificate to start working properly so don’t be worried even if you get weird protection errors when trying to browse the site.
After a while your page should be visible on the Internet! Now when you add new commits to the master branch of your source repository Netlify will automatically fetch the latest version, run the build and update the page. If your builds fail for some reason then the last succesful build will stay online.
Authoring workflow
There are many ways you can handle how the content for your website is written. If you’re happy with the Git flow then you’re pretty much all done and can continue on using your text editor + git combo for writing content.
However, if you’d like to power up your workflow a bit here are some more things you could include in your toolbox.
Typora
One way to improve the experience is to use a separate Markdown editor. I’ve been using Typora for a while now and can wholeheartedly recommend it to anyone.
Even though Markdown is already quite easy to read and write in plaintext form I think Typora just makes it that much a better experience. It behaves quite like any word processor and shows your content files nicely formatted.
One thing that it doesn’t handle that well are the Hugo shortcodes but I’ve noticed that I can use code fences instead of the highlight shortcode and normal Markdown images instead of figure.
And here’s a small magic trick for displaying images. If you include images in your content Typora will try to display them with the best of its ability. However, if those images are located in the static directory then Typora won’t have a clue where to find them unless you give it a little help. If you add this snippet in the fron matter section Typora will be able to display your images properly.
typora-root-url: ../../static
You may need to adjust how many directories to jump backwards depending on how deeply nested the content file is.
Forestry CMS
You can also hook your site up with a full fledged content management system. Forestry is a great option if you want to write your content on the browser like you would with WordPress. It has been designed around the Git workflow so it is a perfect match for a static website.
They also have a great free plan available where you can get three collaborators for free, even if you have a commercial website. Setting up Forestry is quite straight forward so I won’t be making this post any longer than it already is.
Netlify CMS
Despite its name Netlify CMS does not require that you use Netlify. It is a free content management system that you install on your site as a static React web app. You then connect the application with GitHub and start writing.
The setup process is not quite as easy as it is for Forestry but after setting up it is easy to use.
Conclusion
If you managed to make it all the way through this post then congratulations! Hopefully you now have your new and shiny Hugo blog up and running.
Like I mentioned in beginning you can check the Blog with Hugo for more topics about Hugo to gain a better understanding of it and to learn enough about the Hugo internals to be able to tweak your theme.
Discuss on Twitter
Here's how you can set up your own blog using Hugohttps://t.co/L4S01fzUAz
— Janne Kemppainen (@pakstech) April 27, 2020
Previous post
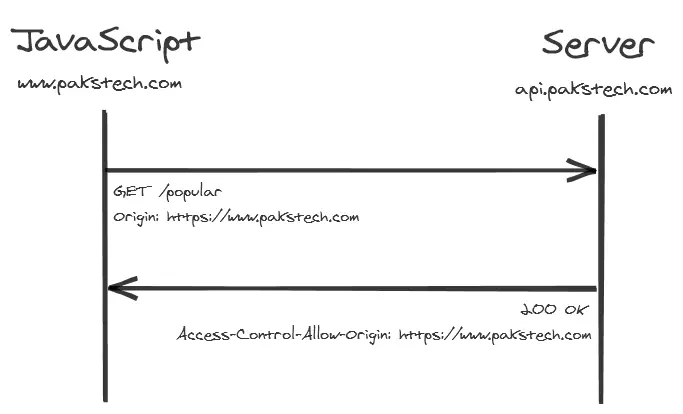
CORS Simply Explained